Short Term Goals.
My short term goals are to create a portfolio that I can take for interviews for an interview for a placement, and to improve my work and very it more so that I can have contrasting pieces. I also want to get better at garment construction since I want to make my own collection in 3rd year. I also need to save up to be able to afford my 3rd year collection so I am hoping to get paid placements. I also aim to do 2 visual merchandising placements in the summer holidays with the 2 companies that I work for and to try buying next year as well as interview for Topshop hopefully.
Long Term Goals.
In the long term I wish to have 2 portfolios that I can take to interview since companies are very different and can want different things i.e. M&S and All Saints are very different. I would also want to work in a designer house or a luxury high street company such as All Saints doing design or possibly buying. I would in the very long term like to own my own clothing company or possibly branch out into jewellery as well which I am also interested in.
Thursday 29 March 2012
Wednesday 28 March 2012
Shoes day 2

Shoes was an over all joy to do and I learnt many new skills that I may be able to use in other projects or can use if I wanted to change to accessories which could be a possibility.
Monday 26 March 2012
Shoes Day 1
Today I modified my final design since we didn't have any white matte leather like we were told so I have changed my idea to a far simpler idea with just a bar down the front instead of a disk of any kind. We then masking taped up our lasts and cut them in half and put them onto paper to make our patterns. We then did a mean forme of our shoe which was the average and designed out patterns on there. We then traced off our designs into pattern pieces using bradl's and then added on the necessary seam allowances and then cut out our pieces of leather so that on Wednesday we can finish our shoe!
Top Picture: Masking tape pieces - inside and outside of last, Mean forme, Standard pattern.
Bottom Picture: Pattern pieces with seam allowance and Leather cut out pieces.

Top Picture: Masking tape pieces - inside and outside of last, Mean forme, Standard pattern.
Bottom Picture: Pattern pieces with seam allowance and Leather cut out pieces.


Thursday 22 March 2012
Illustrator
In illustartor we will be using it to make a pattern, and made the new document a3 and portrait.
 we then did a red star with blue circle over the top and used the divide tool.
if you then drag the shapes into swatches and create a new shape it will create a new pattern.
 |
| green:we then used the width tool, we then opened up the shapes as well and made a rectangle, we then clicked the rectangle and changed the outline, and used the width tool |
 |
| yellow square: we then used the warp tool to create the pushed in edges. |
 |
| pink: we then made a hexagon and used the pucker tool and clicked and dragged to create a pattern. |
 |
| red: we then used the wrinkle tool |
 |
| blue: we then used the bloat tool on a rectangle to create fingers |
 |
| purple: we then used the scallop tool to create the edges |
 |
| navy: we then used the crystalize tool. |
 |
| ed and blue : we then used the swirl tool to create the curves on the star |
 |
| we then created a new file and opened pathfinder as well as the shape and tools boxes. we then drew a long rectangle,we then rotated the rectangle we rotated it to 90 degrees and then copied it so there were 2 rectangles. we then selected both and merged them via pathfinder. |
 |
| we then made a green rectangle with a circle in the middle and used the move to front tool which took the circle out of the rectangle. |
 |
| the red shape was done using the exclude tool. |

if you then drag the shapes into swatches and create a new shape it will create a new pattern.
Wednesday 21 March 2012
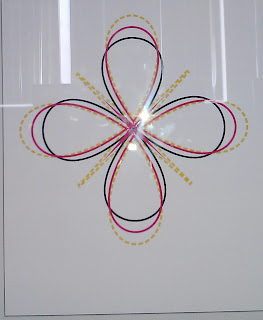
Final Design + Toile
 |
| My final Design - A Volumous cape! |
I have done a paper version since we are only toiling in white so that I can see how the colours will react together and have started to consider ways that I can start to layer them so that they look more interesting, in my book. I have also today done my Toile and have shown Angela who liked it but said that because of the time restraints that I should make the petals more spaced out and bigger so that I will finish by the deadline without stress since everyone will be trying to get on the single spot welder.
 |
| My Lasercut petals, although will be in black and white. |
 |
| My sonic welded ties for my cape. |
Thursday 15 March 2012
Leather Inductions
Today we had leather inductions on the Walking frog, Disk post, Disk machines, and Twin needle. These were so that we could work with leathers so that we could make our shoes but also in case we wanted to change to accessories and do things like bags etc, or use leather in our collections. The machines which have posts/arms are the ones that are best used when you have a curved surface such as a shoe since it allows you to get into more angles far more easily than the flat machines. The machines are designed for heavy weight materials or leather which would quickly break a normal sewing needle that you use on fabric, as you can see in the bottom pictures once you sew onto leather you can't unpick otherwise you are left with a row of holes where the needle went in (top of the bottom picture).
.jpg) This means that if in future I want to make any garments out of leather I need to become much more efficient at using the machines so that I can sew it right first time,since I can't unpick and leathers are expensive. I can do this by sewing more garments since it will improve my sewing abilities and by practicing on scraps of leather that are laying around so that I can practice simple shapes like circles etc which will help me later with more complicated patterns.
This means that if in future I want to make any garments out of leather I need to become much more efficient at using the machines so that I can sew it right first time,since I can't unpick and leathers are expensive. I can do this by sewing more garments since it will improve my sewing abilities and by practicing on scraps of leather that are laying around so that I can practice simple shapes like circles etc which will help me later with more complicated patterns.
.jpg)
Monday 12 March 2012
Final Design for Shoes
Today I showed my designs that I had worked over the weekend on to Kieran. She particularly liked my wedge sandals and how colourful they were however I decided not to make any of them since I couldn't make the wedge heel before the project hand in and so thought that it took away from many of the designs. She however liked 2 of my flat sandal designs and said that I should mix the 2 together since I liked the big metal disk from one but liked the overall design of the one below. I therefore have been working to mix the 2 together. I think this has helped me because I have vastly improved in Photoshop which is what I designed most of the shoes in and have found it to be a great help and can see why Photoshop/Illustrator/In-Design have become so popular in the industry since you can easily take bits that you like from other shoes and make an entirely new shoe that is much better than the originals so easily.
For the shoebox section I have been on WGSN and started to look at packaging trends,materials,structure and print patterns. This will help me to create a fashion forward shoe box that is on trend, I have also tried to improve on my presentation with these new pages by laying them neatly out in word and then being just able to print them out which has made the pages look a lot neater since the pictures are all straight etc. and well presented.
For the shoebox section I have been on WGSN and started to look at packaging trends,materials,structure and print patterns. This will help me to create a fashion forward shoe box that is on trend, I have also tried to improve on my presentation with these new pages by laying them neatly out in word and then being just able to print them out which has made the pages look a lot neater since the pictures are all straight etc. and well presented.
Thursday 8 March 2012
Laser Cutting comments+reflection


Wednesday 7 March 2012
Richard Sweeney


Tuesday 6 March 2012
Illustrator 2
Cloning and Aligning
 Create an A3 landscape page using the people icon and changing the size. Draw a rectangle with the rectangle tool. Then press the alt and clone them to move them. CMD + A to select them all. then click align centre to make them all align up. Then click the horizontal distribute center to make the spaces between them correct.
Changing Stroke Colour.
 Then create a square and change it so that it has no fill, by clicking the white box with a red line through, change the stroke colour to a different colour and to make bolder increase the pt. then create a second stroke and leave it as black and increase the pt so that you can see it.Then add in another stroke in a different colour.
Distort & Pucker.
 Then click one of the lines and distort and pucker it to create a pattern. then click dash and put in values to create a gap style.
Ungrouping.
 select the whole thing, object then expand appearance and right click and ungroup, then they will move seperately. Then clear the board.
Creating Shapes.

Pattern Tool.
Create a rectangle with a circle as well that overlap. then open pathfinder. then join them by selecting them all and pressing the left hand tool. then use the eraser tool to create a new pattern.
 Create an A3 landscape page using the people icon and changing the size. Draw a rectangle with the rectangle tool. Then press the alt and clone them to move them. CMD + A to select them all. then click align centre to make them all align up. Then click the horizontal distribute center to make the spaces between them correct.
Changing Stroke Colour.

Distort & Pucker.
 Then click one of the lines and distort and pucker it to create a pattern. then click dash and put in values to create a gap style.
Ungrouping.

Creating Shapes.


Then create a rectangle, and a square by double clicking. double click and accept the value for a circle if you want it to be circular. Click the polygon tool and create 3 sides for a triangle. click the star value and then you can change how many you have.
Pattern Tool.
Create a rectangle with a circle as well that overlap. then open pathfinder. then join them by selecting them all and pressing the left hand tool. then use the eraser tool to create a new pattern.
Monday 5 March 2012
Shoe Project Comments + Reflection
Kieran today looked at our books and I was told that my research and idea's were good but to start to design my shoes and to look at ways of embellishing the leather if I so wanted to and to create my patterns since I am looking into the idea of printing or laser cutting the leather from a pattern that I have made using ancient Greek symbols etc.
Therefore I will start to laser cut some patterns out on paper and will also start printing some patterns onto fabric that I design and will then try to do the same onto white matte leather if I have the time to.
I have also started my marketing research for the shoebox section of this project and have started to look at conceptual packaging, and have completed my S.W.O.T & pen profile for my research. This will help me to identify the packaging that I will use based on my research into my clients and the need of my shoe.
 |
| A design created using Image Maker on Calico. |
Therefore I will start to laser cut some patterns out on paper and will also start printing some patterns onto fabric that I design and will then try to do the same onto white matte leather if I have the time to.
I have also started my marketing research for the shoebox section of this project and have started to look at conceptual packaging, and have completed my S.W.O.T & pen profile for my research. This will help me to identify the packaging that I will use based on my research into my clients and the need of my shoe.
Thursday 1 March 2012
Lasecut Project Reflection + Comments
Today I was told to work more on the mannequin and to make the pieces we're making more couture, I have therefore decided to find some origami 3D shapes to make and put onto the jacket that I will be making, and we need to also make the outfit less fitted so I am focusing on the 3D shapes rather than the fit of the jacket.
 Some inspiring pictures I intend to work from:


Tuesday 28 February 2012
My Handmade Item - Garnment construction


Illustrator - First Lesson
Illustrator is the programme that we need to use with the Lasercutter, therefore I have downloaded Illustrator and have put my patterns into Illustrator.
We opened up a new document in illustrator, you can have multiple art boards up on illustrator to work with. The fill is on the top and the stroke is at the back behind the fill and you can double click to change the colours. in appearance you can change the line width by changing the stroke amount. \the white mouse will allow you to select a point and move a point around. With the pen tool you can create a circle and then using the straight line turn any curved lines into straight lines to create a square
We opened up a new document in illustrator, you can have multiple art boards up on illustrator to work with. The fill is on the top and the stroke is at the back behind the fill and you can double click to change the colours. in appearance you can change the line width by changing the stroke amount. \the white mouse will allow you to select a point and move a point around. With the pen tool you can create a circle and then using the straight line turn any curved lines into straight lines to create a square
Sunday 26 February 2012
PDP Day - Table
For our PDP appointment we looked at how we felt we were getting on and about work placements for summer. For my work placement I am trying to get a work placement at Debenhams for a week to do Visual Merchandising as I want to try everything out so that I am sure of what I want to do. I also want to try and apply to work in the Design section of a high street store i.e. River Island or Topshop. Angela has said that in order to try that I need to up-date my CV and to also create a portfolio, so I will be trying to do that in the next few weeks so that I can start applying early.
Friday 24 February 2012
Comments + Reflection
Today I showed Claire my book and she said that the pages that I re-did looked really good and were much better organised.
She has said that I need to try and make some pro-to types of the shoes that I might make just so that I can have a play around with shapes etc, so I am going to do a few quick designs and make some mock ups out of card. She also said that I should try some collaging since I am using geometric shapes which I will try a few pages in since I think some interesting shapes could come out of doing so.
I also needed to figure out how to fit my Olympia theme with my Artists which could be harder to do however I have started to do that and have started with Jean Dubuffet which has been fairly easy and I've managed really well so far.

Wednesday 22 February 2012
Sunday 19 February 2012
Paris Trip
Collette


 Collette is a French clothing and accessory boutique. It contains an exhibit space, book shop and "water bar" serving over 100 different types of bottled water. The Visual Merchandising in this store is extremely good, the window displays are interesting and pull you in and the clothes are displayed in such a way that they are easy to see on you and encourage you to buy. The shop is laid out well and brightly lit. Shoes are even at the bottom of the mannequin displays to complete the look!
Louvre
We walked down to the Louvre to see the controversial glass triangle and to see some more of the sights as well as the architecture which I was particularly interested in since it is extremely different to English architecture especially the older buildings i.e. Churches etc.
Merci
 We also went to Merci and saw all of the womens and mens department and all of the different things that they had, such as the make your own perfume and all of the little bicycle parts on sale. It sells many vintage designer items such as burberry coats and dior jackets.
Boat Trip/Bus trip
We were taken down a river on a boat to see all of the major sites such as Notre Dame, the eiffell tower, the concorde etc. We then went on a bus tour around them as well so that we could take lots of photo's which helped since the architecture in France is very different to english architecture and had new and interesting shapes that could be encorporated into designs.
Fabric District
The fabric district showed off many different types of fabrics as well as having many haberdashery stores in the area. the Marche St Pierre fabric store has a variety of silks, wools, linen, cotton and jersey. The Tissus Reine shop has a variety of patterns and there was a huge variety of buttons and trimmings to choose from. They also sold the liberty fabrics as well.
Premier Vision
We went to Premier Vision which is a trade share and showed us all of the different and diverse materials that there are as well as the companies that there are, from printing, to lingerie, to colour etc. It also showed different ways to put fabrics together as they had many types of different displays to pull you in and you got to watch people ordering fabric which was interesting to see how it was done.
Paris has helped because it has shown me a new culture for which to draw inspiration from, has allowed me to see different fashions. Has also allowed me to go to places like premier vision which I wouldn't have been able to go to otherwise and has allowed me to discover businesses that I may wish to intern with after uni or at least watch what they do because I liked their style. It has also allowed me to see Collette which I can take inspiration from since I am interested in Visual Merchandising and can put some of what I've seen into practice. The fabric district has also allowed me to see more fabrics, to look at prices and to find out about different materials that are less popular in the UK.


Louvre
We walked down to the Louvre to see the controversial glass triangle and to see some more of the sights as well as the architecture which I was particularly interested in since it is extremely different to English architecture especially the older buildings i.e. Churches etc.
Merci
Boat Trip/Bus trip
We were taken down a river on a boat to see all of the major sites such as Notre Dame, the eiffell tower, the concorde etc. We then went on a bus tour around them as well so that we could take lots of photo's which helped since the architecture in France is very different to english architecture and had new and interesting shapes that could be encorporated into designs.
Fabric District
The fabric district showed off many different types of fabrics as well as having many haberdashery stores in the area. the Marche St Pierre fabric store has a variety of silks, wools, linen, cotton and jersey. The Tissus Reine shop has a variety of patterns and there was a huge variety of buttons and trimmings to choose from. They also sold the liberty fabrics as well.
Premier Vision
We went to Premier Vision which is a trade share and showed us all of the different and diverse materials that there are as well as the companies that there are, from printing, to lingerie, to colour etc. It also showed different ways to put fabrics together as they had many types of different displays to pull you in and you got to watch people ordering fabric which was interesting to see how it was done.
Paris has helped because it has shown me a new culture for which to draw inspiration from, has allowed me to see different fashions. Has also allowed me to go to places like premier vision which I wouldn't have been able to go to otherwise and has allowed me to discover businesses that I may wish to intern with after uni or at least watch what they do because I liked their style. It has also allowed me to see Collette which I can take inspiration from since I am interested in Visual Merchandising and can put some of what I've seen into practice. The fabric district has also allowed me to see more fabrics, to look at prices and to find out about different materials that are less popular in the UK.
Thursday 9 February 2012
Comments + Reflection
I started doing a few patterns for my lasercut excercise last week and she really liked the bold one with the patterned petals in and told me to try inversing some of my patterns and to play about with the shapes.
Kat also told me to try and put my second print, the leaf veins in with the other pattern to see how it would look as well as to scan the shapes into photoshop so that I could play around with them there for when I got my patterns that I may want to mix about together and so that I could convert them into a file I could use on the laser cutter.
We also had the second idea to create movement that I would cut out tiny petals in black and white and use them to create layers and to tack them onto the other 2 patterns to make the pattern seem more 3D.
She also told me to do more drawings still, so I have looked for some flowers with more patterns that I could use since these seem to make the best effect that I like and so am looking for more patterned flowers.
I will be doing all of these things so that I can move forward and experiment a lot more with the idea of tacking things on, since it will give great movement and will be incredibly interesting. The drawing will help me create new patterns or add to my existing pattern and inverting the patterns I do have and mixing them together will give me new interesting patterns which could look very nice together or may look too busy.
Tuesday 7 February 2012
Photoshop - Start of Twiggy photo
the poster is to go behind the drawing. The Corduroy is to show how real fabric is.
Then we opened up the twiggy1.jpg in Illustrator. We then rasterized the picture and traced it and changed it to colour and changed the colours to 32 maximum.
Then open photoshop, we then changed the resolution in photoshop to 72, and changed the colour to RGB and the width and height.
We then pasted it as pixels into Photoshop. We then turned off the background but still have a white background from illustrator and used the magic wand to delete the background. We then erased her earrings out apart from where they sit in front of her shoulder or neck. Then using the magic wand tool we selected around her. We then use the smudge tool and smudged out what was left of her earrings. To make her smoother we went into Blur and used Gaussian blur. We changed the radius pixels to 1.2. We then used the blur tool at 100 and smoothed at the angles.
We then added a new layer and titled it dress.
use the pen tool above the T, then do click on a pointed area and curved areas around the dress. Afterwards we select the converge point tool and alternate and press the cmd key to create a curve line around the dress. We then right clicked and made the path a selection.
and used the fill bucket and used a pattern overlay with the paper selection for the dress.
Wednesday 1 February 2012
Trend Boutique - Austerity vs Luxury
AUSTERITY
Why Austerity vs. Luxury?
The end of "era of mass consumption" & the birth of the "age of austerity"
The growing divide between the rich and the poor resulting in the squeezed middle.
Both in the UK & also Globally.
Economies split traditional (little or no manufacturing (reliant on service industry & our consumption), high level of debt, consumers need a reason to buy) vs BRIC(new economies i.e. Brazil - 6th biggest economy) ( Restrained consumption, strong manufacturing bases or natural reserves, low debt, growing wealth).
Since the recession we have started to see a change in the rules ...
- Ways we do business
- Who we sell to and the way we sell
- A reassessment of what we have to offer as a country
- Aesthetically design codes have also seen change
Key Drivers.
The current economic situation can be mapped out right back as far as the start of the industrial revolution ( 1790's-1860's) However even if we go back as far as the 40's there are a number of similarities & key drivers that bring us to the point where we are today.
1940's Key Drivers.
- the 2nd world war
-rationing, allotments & make do & mend
-post-war industrialisation
-high level of debt ( to USA)
- high birth rate & the introduction of the baby boomer generation
- the introduction of the welfare state.
Key Drivers - 50's - 70's
- post war economic boom went on until the 70's
- the advent of the teenager
- popular culture
- women's desire to work & have financial freedom
- the introduction of credit cards, cash machines, & desire to own home
- international travel.
Key drivers 80's - "Greed is good"
- top down economics ( tax cuts to wealthy to increase growth)
- the de-industrialisation of the UK
- the YUPPIE
- period of boom & bust
- civil unrest with riots, miners strike
key drivers 90's
- global monoculture
- information age
- personal electronics, mobile phones & video games
- utilitarian aesthetic
- 24 hour & Sunday shopping
- population growth through migration.
2000's Key drivers
- high employment
- growth in consumer debt ( at end of 90's had doubled from 80's)
- cheap finance, property boom & equity release offers
- conspicuous consumption - "Bling" & "IT" bags
- throwaway fashion
- continued rise & expansion of the supermarket
By the late 2000's we had already seen a change in direction due to the September 11 attacks & the subsequent war on terrorism etc. We began to feel threatened so wanted to look to past/ family & friends for comfort. We had already become to understand the environmental impact. Recession bought about a time for us to stop & reflect. It also brought about the age of austerity and the end of our mass consumption. We have started to explore new models where we no longer need to own or physically produce an item.
We also started to become more radical & angry with companies that didn't fit our ideals. Plus the rise in social media also gave us a voice. the feeling of being squeezed cannot be underestimated - and has lead to significant growth in the value sector.
The age of austerity is defined by:
- the value sector showing huge growth
- Primark and Sainsbury grew their uk clothing sales by £1.1bn and £0.46bn respectively between 2005 and 2010.
But it has challenges too, wage inflation in Chine, Sustainability issues, increase in cotton prices etc.
Austerity is not just about e value sector, but wanting a reason to connect for the middle market/luxury sectors.
it has created more austere aesthetics : -rough luxe -hidden luxury -brand quietness.
Austere - darker tones/dull/simple/paired back/clean lines.
Re-defining Luxury
The recession & the loss of the "pressitge (prestige for the mass market)" market has also led to significant shifts in the luxury sector.
- heritage & craftsmanship
-Eco luxury
- Bespoke & ultimate exclusivity
- new technologies.
A return to heritage & craftsmanship is probably the most obvious direction, however it is not always the easiest to achieve for newer luxury brands
- brand resonance
- workmanship & traditional skills (can be difficult to find)
- materials of highest quality
- brand quietness i.e. Mulberry & Louis Vouitton
Eco-luxury is also another growing area, but again can be difficult to do well - also can be a complete dichotomy
- innovative materials & production methods
- working with artisans & craftspeople
- caters to growing celebrity status/ over seas markets i.e. Vivienne Westwood, Stella Mccartney & Lotus
Developing bespoke & individual items has developed around the need to cater for the extremely rich.
- wide range of services from traditional bespoke suiting to diamond encrusted ipads.
- growth in concierge services
- differentiates itself from prestige goods
-connoisseurs of luxury products i.e. Louis Vuitton, Couture shows.
Using new technologies in the luxury sector is often where fashion takes the lead
- social media (live tweets/feeds of shows)
- Augmented Reality, 4G & 4D technologies
- E-commerce & mobile shopping (& reducing the order process) i.e. Ralph Lauren, Burberry, Prada,Chanel.
1st talker - textile designer
moda show - birmingham.
Davinder Madaher
2nd talker - Social media: challenge & opportunity
Harvey Nichols using Youtube to brand i.e. The walk of shame, shows that if you did the walk of shame in Harvey Nichols then you would look so much better and would look more glamorous,. The video is quite fun and edgy and shows the clothing off well and caters to their clients and gives a reason to why you should pick a Harvey Nichols new years eve dress.
3rd- male grooming
4th talker - Lucy (fashion writer & trend forecaster)
Forecasts future trends and owns a Vogue endorsed ecommerce trend portal. Pret-a-rever
it is fashion editorial within the season.
editorial is very product led i.e. Net-a-porter can still have 400 pairs of shoes they need gone and so you'll get a special e-mail saying their great for the weekend etc.
live in a consumer led culture.
The Design Democracy/Dilemma
Karl line at net-a-porter, wont allow Chanel products online or to the website to be linked too. Chanel is a brand who engages with blogger and don't want their lines on net-a-porter. he has developed a line though to sell on net-a-porter, the high street are making a living off the back of these designs and now they can get the millions instead of the other high street stores.
item Vs idea. market is focused on the item i.e. "must-have" it's taking fashion away from the creativity.
Fashion is void of creative people now.
pret-a-rever is about the dreams and inspirations that exist within collections.
Designers are trying to communicate with customers - Lanvin's video - pitbull
Tuesday 31 January 2012
Comments
Claire has said to do more mark making which I haven't done much of yet, so I'm going to get a few more artists and start to do more mark making and get some shapes which I find really inspiring and start to try to fit the themes together a little bit better than I previously have been.
Photoshop...
 |
| Final Print |
 |
| Original Drawing |
 |
| Picture 2 |
 |
| Picture 3 |
 |
| The complete block. |
We opened the drawing jpeg in Photoshop and then clicked the padlock to change the background to a layer. To tidy up the drawing we turned the snap tool up and then cropped the edges off as they were untidy.
We then zoomed in so that we could smudge any remaining parts into the corners so we had a complete picture.
We then changed the size of the canvas to 480 x750 and moved the picture down to the bottom and added 1500 to the height in pixels so there was extra space at the top and then dragged the picture while holding alt so that it would make a copy and drag it up into the space above and then flipped it vertically so that it matched up. (picture 2) Then we edited and flipped the top one vertically so that they lined up (picture3) and then changed the canvas size so it's double the width and defined it as a pattern. We then got a new file and made it 300x300 and changed the resolution to 72 and used the pattern paint tool to repeat it several times.
This will benefit me as I will be able to make my own print patterns so that my work can be more unified and unique while still be exciting. It will also help me to be able to do other things on Photoshop now that I know more simple steps, such as how to easily replicate something, change the size, merge layers etc.
Subscribe to:
Posts (Atom)