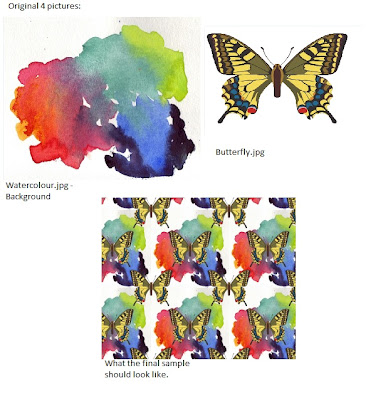
We used 2 pictures (above) to start with and opened the water colour document to start so it was the base. We then clicked the padlock so that the background was unlocked and became a layer and then opened the butterfly jpeg and dragged it onto the watercolour page. We then aligned the butterfly, then clicked the ruler’s option and put both guides at 400 so it was central. We then created another layer of the butterfly which was a copy, and then clicked the eye on original butterfly so we couldn't see it. We then went to the view tab and turned the snap tool on and used the rectangular marquee tool around a quarter of the butterfly then cut out with command + x then pasted it back onto the board and moved it to the bottom left corner. This was so that when the pattern is repeated a complete butterfly is formed. We then cut out the left side and moved it to the left side and clicked the eye on the original pattern. When we have finished you get a piece with a butterfly in the middle and a ¼ of one on each corner. We then defined the pattern, created a new document that was 200cm by 300cm and used the bucket tool to paint in our pattern. We can change the pattern by using the offset tool and moving it to make the pattern slightly different.
Learning this technique will help me with my work and inspire me as I can make different patterns that are unique to my work and fit in perfectly with my projects which can be laser cut or printed onto fabric so that my work is more personal and unique aswell as give my work an edge to it.
